Author: Matillion
Date Posted: Dec 18, 2023
Last Modified: Apr 7, 2025
How to Install a Data Productivity Cloud Pipeline
This article shows how to install a Pipeline from the Matillion Exchange into the Data Productivity Cloud.
Installing pipelines from the Matillion Exchange
The Data Productivity Cloud Designer can directly browse and install pipelines from the Matillion Exchange (this website). Start in your Data Productivity Cloud Pipelines panel and follow Add > Browse Exchange
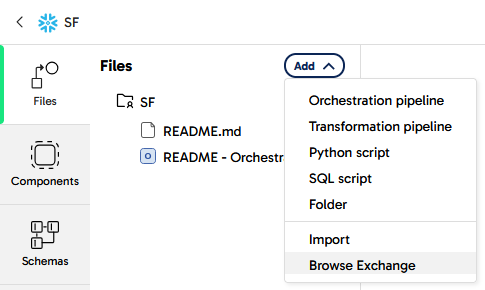
Add search terms to help find the pipelines you need.
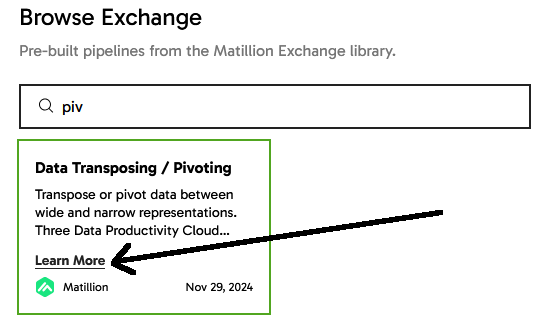
All pipelines on the Matillion Exchange have a web page that contains detailed instructions and documentation. Click Learn More on one of the pipeline tiles to open the relevant page.
Installing pipelines from a zip file
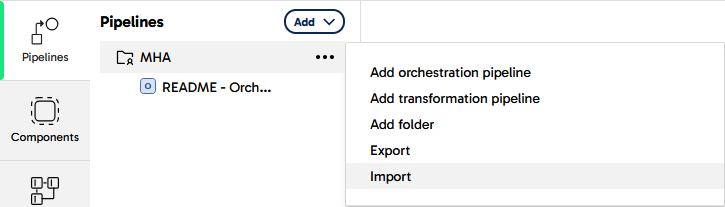
The Data Productivity Cloud Designer can import a zip file containing one or more pipelines. Use the import pipeline menu and browse for the zip file in your local filesystem.
Within a zip file, individual pipelines are stored as YAML files. If you have a YAML file (or files) to import, you will need to put them into a zip file for importing.
Creating a zip file on Linux
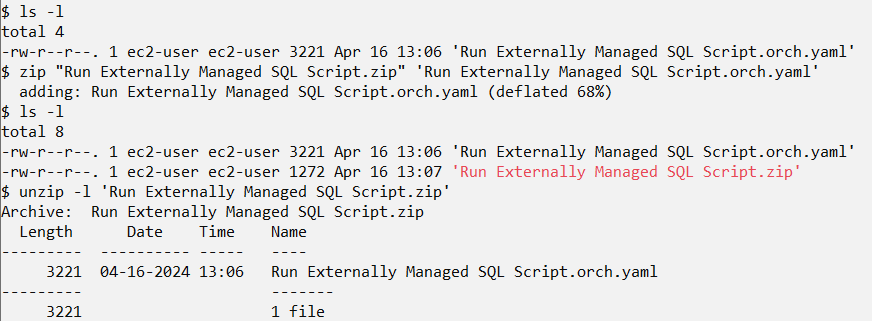
Linux users can create a zip file from the command line using the zip utility like this:
zip "Run Externally Managed SQL Script.zip" "Run Externally Managed SQL Script.orch.yaml"
You must use quote symbols if the file names contain spaces.
Creating a zip file on Mac
Linux users can create a zip file from the command line using the zip utility like this:
Mac users can create a zip file in a Finder window or on the desktop. Control-click the file, then choose Compress from the shortcut menu.
- If you compress a single item, the compressed file has the name of the original item with the .zip extension.
- If you compress multiple items at once, the compressed file is called Archive.zip.
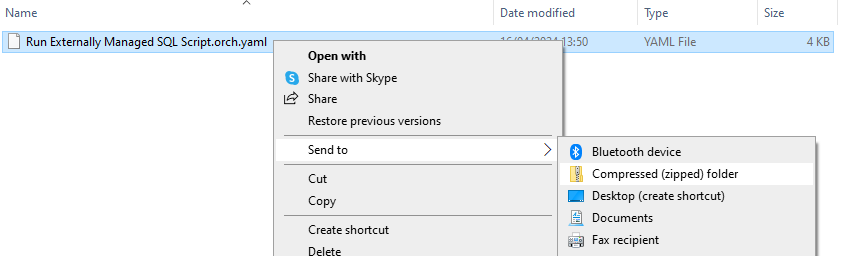
Creating a zip file on Windows
Windows users can create a zip file from the File Explorer with a right-click:
Installing pipelines using your own git repository
You must have registered your own git repository with your Data Productivity Cloud project. For example GitHub, Azure DevOps, GitLab or Bitbucket
It is simplest if you first Commit all local changes in your Data Productivity Cloud project, and push them to your git repository.
Start with the YAML file(s) of the pipeline you want to install. If you are starting with a ZIP file (previously exported, or downloaded from the Matillion Exchange), then you will need to extract the .yaml file(s) from the ZIP file.
Copy the .yaml file(s) into your own git repository. The directory structure will be mirrored in your Data Productivity Cloud Pipelines panel. Commit the changes. If necessary, merge the changes into the branch that your Data Productivity Cloud project is using.
Back in your Data Productivity Cloud project, pull remote changes to make the Pipeline appear in the Designer interface.